The back half of a base cabinet is basically a black hole. You shove things in there, something rolls to the back, and six months later you find it expired. I have organized pantries and kitchen cabinets in four different apartments over the past eight years, and the single fix that actually sticks is a pull-out shelf. The problem renters run into is that most of the good options require drilling into the cabinet walls or floor. Landlords say no, cabinet materials are sometimes too thin to hold a screw, and you end up returning the thing. That is where the no-drill adhesive method comes in. Done correctly, a no-drill pull-out cabinet shelf bonds firmly, slides smoothly, and holds a realistic load of canned goods and bottles without budging.
This guide walks through installing the Fokyfok Pull Out Cabinet Organizer, which uses an adhesive-and-rail system with no screws required. The shelf adjusts from 14 to 21 inches wide and 17 to 24 inches deep, so it fits most standard base cabinets. The install takes about 20 minutes if you prep correctly, or about two frustrated hours if you skip the measuring step. Follow these five steps in order and you will not be repeating the job.
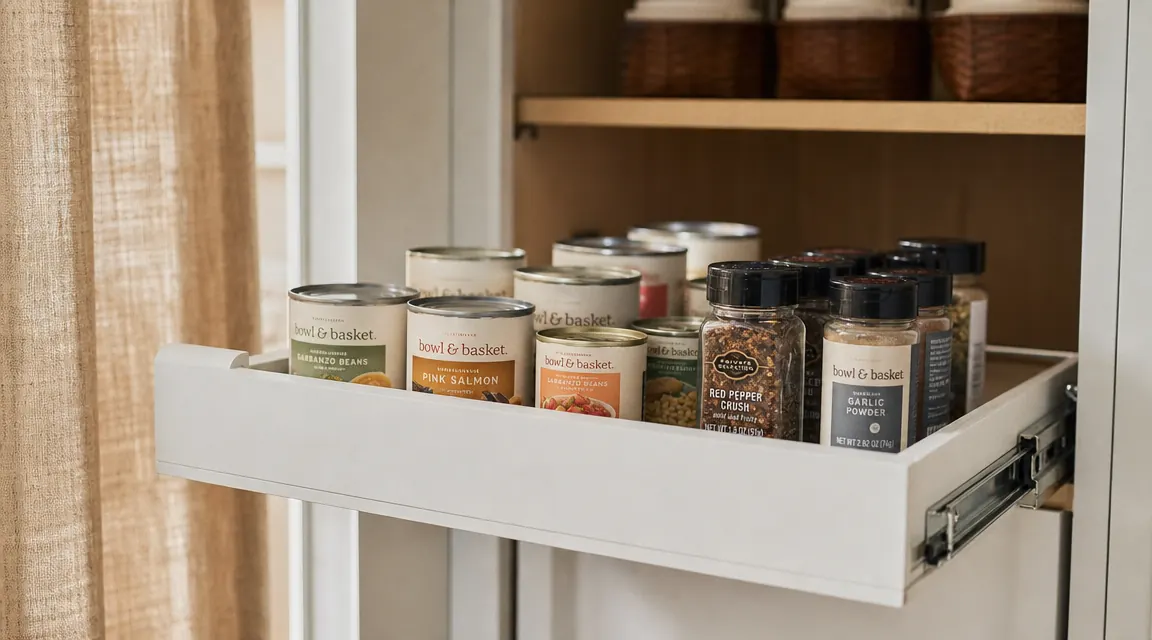
Your cabinet back panel is eating your groceries. Here is the shelf that stops it.
The Fokyfok no-drill pull-out shelf adjusts from 14 to 21 inches wide and uses a pressure-adhesive base that bonds to laminate, wood, and coated MDF without a single screw. Check today's price before you start measuring.
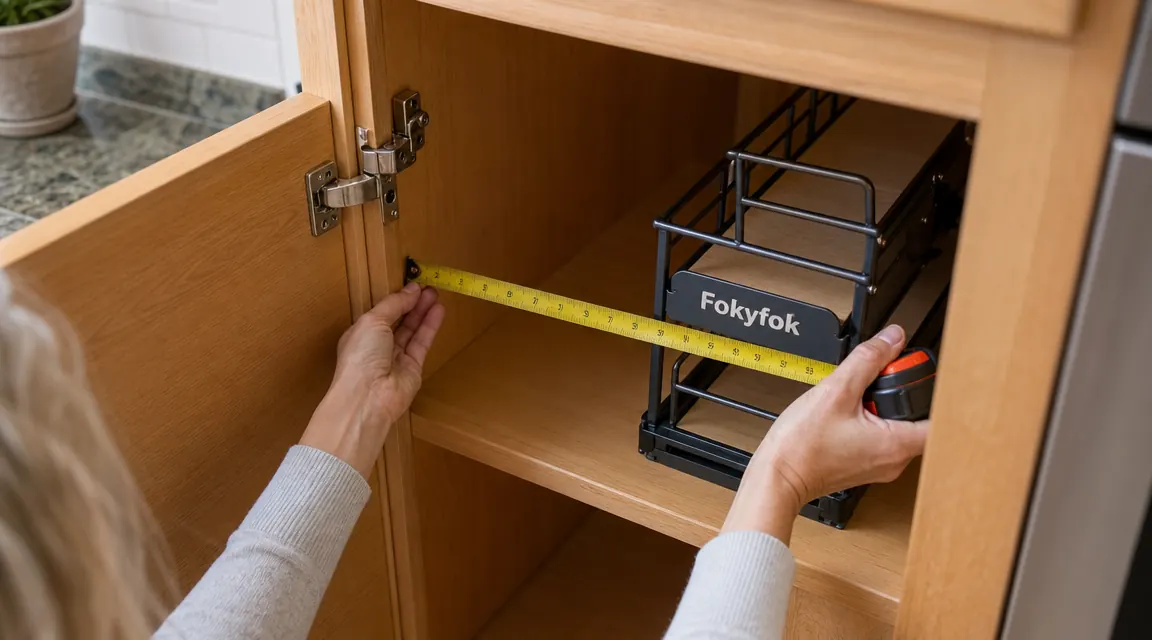
Amazon Check Today's Price on Amazon →Step 1: Measure Your Cabinet Opening and Interior Depth
Pull everything out of the cabinet and set it on the counter. You need two measurements: the interior width between the side walls, and the interior depth from the front face frame to the back wall. Use a tape measure, not eyeballing. Write the numbers down. The Fokyfok shelf adjusts from 14 to 21 inches wide and 17 to 24 inches deep, so as long as your cabinet falls inside those ranges you are good. Most standard base cabinets are 21 to 24 inches deep and 15 to 18 inches wide, which lands squarely inside the Fokyfok range.
One thing people miss: subtract about a half-inch from your measured interior width before you set the shelf width. You want a small gap on each side so the shelf can extend forward and retract without the basket scraping the side walls. If your cabinet opening is 17 inches wide, set the shelf to 16.5 inches. If the basket rubs during operation, it will eventually loosen the adhesive bonds on that side. A little clearance prevents that problem entirely.
Also check for any obstructions inside the cabinet: water pipes under the sink, a center partition in a two-door pantry cabinet, or hinges that stick out from the door frame into the interior. Measure the usable flat floor space specifically, not just the overall cabinet dimensions. Some cabinets have a raised lip at the front where the door sits. If that lip is taller than about a quarter-inch, the shelf basket may catch on it when you extend it. You can sometimes work around this by positioning the rails a few inches back from the front edge. Do a dry run with the basket before committing to any adhesive position, and verify the door closes completely when the basket is in the retracted position.
Step 2: Clean the Cabinet Floor Thoroughly
This step decides whether your shelf stays put for two years or falls off after two weeks. Adhesive bonds to clean, dry, smooth surfaces. It does not bond well to dusty laminate, greasy cabinet floors, or surfaces that have any residue from previous shelf liners, contact paper, or non-slip mats. Get that stuff out before you even open the Fokyfok box.
Wipe the cabinet floor with a damp cloth first to remove dust and loose debris. Then go over it with a rag dampened with rubbing alcohol or a small spray of white vinegar. Let it dry completely before moving on. Completely means sitting for at least five minutes, not just until it looks dry to the eye. The adhesive pads on the Fokyfok rail system are pressure-activated, and any moisture underneath them will prevent a full bond. If your cabinet floor has deep scratches, peeling laminate, or a rough texture from an old shelf liner, sand the high spots lightly with 220-grit sandpaper and wipe clean again.

One thing that catches people: some cabinets have a textured or embossed vinyl floor. The adhesive pads will stick to this, but the bond will not be as strong as on smooth laminate or wood. If your cabinet has that heavily textured vinyl, consider adding a thin sheet of smooth contact paper to the area where the rails will sit before applying the adhesive. This gives the pads a flat, uniform surface and dramatically improves hold.
Step 3: Set the Rail Width and Position the Rails
The Fokyfok organizer ships with the rail system and basket separate. The rails are the two side runners that the basket sits on and slides along. Before you peel anything, set the rail width to match the measurement you took in Step 1 (interior cabinet width minus half an inch). The rails lock into the three crossbars at whatever width you set. Slide the crossbars to your target width and snap them into the locking notches. Give the whole frame a firm shake to confirm it is locked. If it flexes side to side, it is not seated in the notches yet.
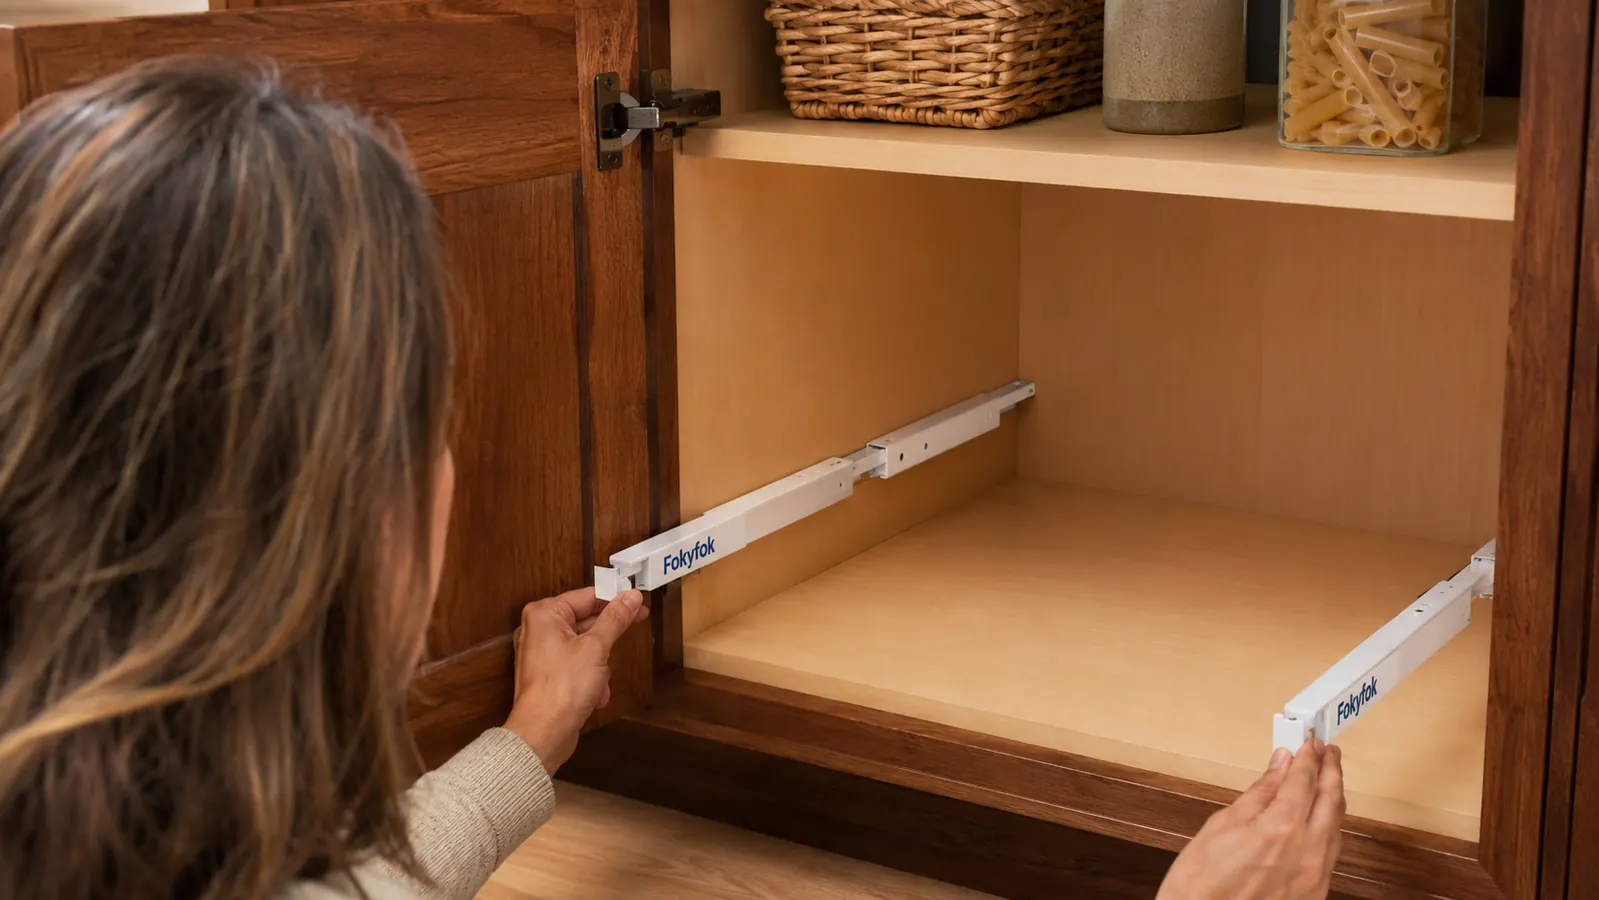
Place the rail frame inside the cabinet without peeling the adhesive backing yet. Slide it back until the rear crossbar sits about one inch from the back wall. Check that the front of the rail frame sits roughly flush with the interior face of the cabinet, or slightly recessed. If the rails stick out past the door frame, the door will not close. Mark the four corners of the rail frame lightly with a pencil or a small piece of painter's tape so you have a positioning guide before the adhesive goes down.
Make sure the rails sit level left to right. Cabinet floors are usually flat, but occasionally they are not, especially in older construction or apartments where the building has settled. If you put a small bubble level on the top of the rail frame and it shows even a small tilt, put a thin shim (a folded piece of cardboard works) under the low side before finalizing placement. A tilted shelf will have the basket drifting to one side on its own, which is annoying and puts uneven stress on the adhesive pads over time.
Step 4: Apply Adhesive and Bond the Rails
Peel the backing off each adhesive pad on the underside of the rail frame, one at a time. Do not peel all of them at once and then try to maneuver the whole assembly into position. You will misalign it. Instead, peel one side's pads, set that side onto your marked position, press down firmly for 30 seconds, then peel the other side's pads and press that side down.
Press hard. The adhesive pads are pressure-activated, meaning the bond gets stronger the more pressure you apply during the initial set. Use the heel of your hand and lean your body weight into it for 30 to 60 seconds per pad location. Do not just lay the frame down and assume it is bonded. Push on each corner and along each rail. You will feel the pad flatten and grip as the bond activates.
Press hard and hold. Adhesive bonds are pressure-activated. Thirty seconds of firm pressure at installation is worth two years of solid shelf life.
Once both rails are pressed down, do not put anything on the shelf yet. The adhesive needs time to cure to its full bond strength. Most pressure-sensitive adhesives used in cabinet organizers reach about 50 percent of their rated strength immediately but need 24 to 72 hours to fully cure. The Fokyfok instructions specify a 24-hour cure time before loading. Follow it. You can skip it if you want and load the shelf immediately, but if an adhesive pad releases early because it never fully cured, you will be doing this whole install again from scratch. One day of patience saves you an afternoon of frustration.
Step 5: Set the Basket Depth and Load the Shelf
After the 24-hour cure period, slide the basket onto the rails. The basket extends to match the depth range you set. If your cabinet is 22 inches deep and you want the basket to reach 20 inches back, extend the basket sides to that length and lock them at the extension notches. The three-rail design means the basket stays rigid at any depth setting, not just at the maximum. You do not have to fully extend it if your items are shorter, which is useful for a shallow-reach cabinet where you mostly store spices or small packets.
Test the slide before loading anything heavy. Pull the basket fully forward, then push it fully back a few times. It should glide smoothly with no side-to-side wobble and no catching. If it catches on the cabinet door frame at the front, you need to shift the rail frame back slightly. If you are past the 24-hour cure and the adhesive is fully set, you cannot reposition without removing the rails and starting the surface prep again with fresh adhesive. That is why the dry-run positioning step in Step 3 matters so much.
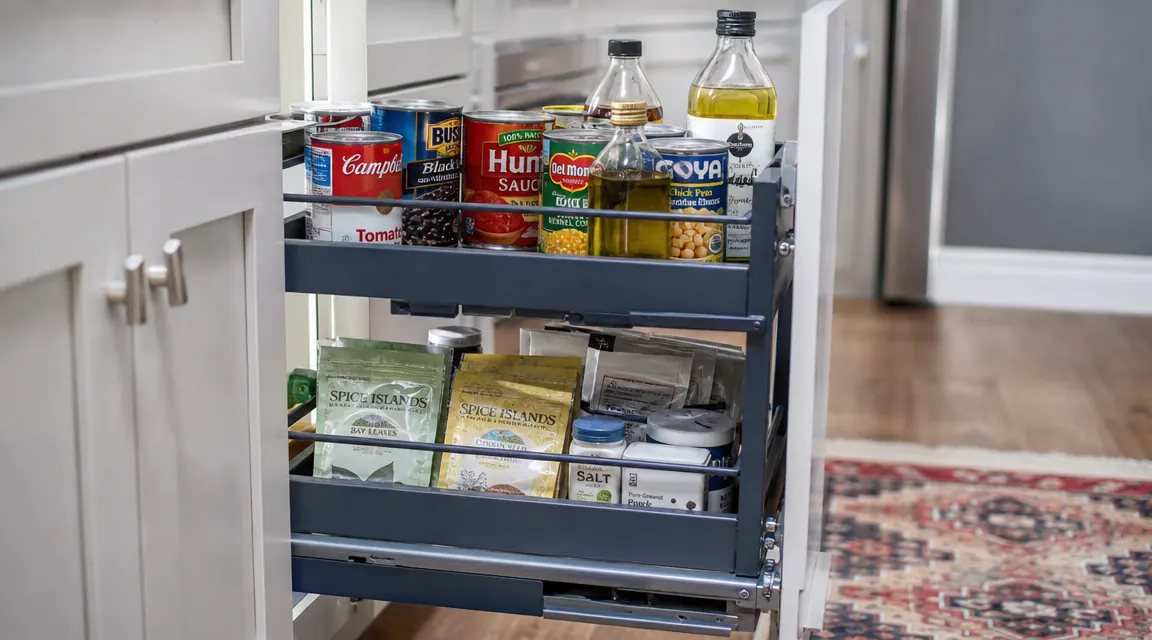
Load the shelf from lightest to heaviest, with heavier items toward the back and lighter items toward the front. The basket handles a realistic pantry load: canned goods, oil bottles, boxed snacks, small appliances like a can opener. What it is not designed for is storing a cast iron skillet or a stockpot. Keep the load under about 20 to 25 pounds distributed across the basket floor and you will have no issues with the adhesive or the rails. If you find yourself loading more than that, you have too much in one cabinet and the pull-out shelf is not the right solution for that specific load.
What Else Helps
A shelf liner on the basket floor keeps loose items from sliding when you pull the shelf out. Cut a piece of non-slip liner to fit the basket dimensions and lay it flat. Small bottles and jars stay put instead of rolling to the back corner. If you have a double-door cabinet with a center partition, you can sometimes install two pull-out shelves side by side, one in each half, as long as each half measures at least 14 inches wide. Label the front edge of each basket with a strip of masking tape or a small clip-on label so you can see at a glance which shelf holds which category of items.
Some people underestimate how much easier the whole cabinet gets to use once the contents are visible and reachable without crouching and digging. The pull-out shelf does not just organize the items you put on it. It changes how you use the entire cabinet because you stop avoiding the back of it. You start actually seeing what you have, which means less food waste and fewer accidental duplicates at the grocery store. If you want to see how this shelf holds up over months of daily use in a deep pantry cabinet, the full long-term review covers what stayed firm and what I would do differently on the second install.
If the back of your cabinet is still a mystery zone, this is the fix.
The Fokyfok pull-out cabinet shelf installs without a drill in about 20 minutes, adjusts from 14 to 21 inches wide, and bonds to standard cabinet surfaces with no screws. Check today's price on Amazon and you can have it in the cabinet before the week is out.
Amazon Check Today's Price on Amazon →